Karina’s Vanilla Caramel Chai Blondies

Hey there Holy F!t fitfam, I’ve missed you guys! Life has been crazy starting a new job and moving at the same time…It’s been a handful! So needless to say, I haven’t had much time to cook or creative space to come up with new recipes. Lately I’ve been working crazy hours, eating mostly fresh fruits and veggies from work, and falling asleep as soon as I have a moment to myself.

When I do have time, like always, I am checking out other healthy food blogs on Pinterest, Instagram, Facebook, and here. One page I’ve stumbled across a few times is Karina’s blog Liberation 2 Karina.

All of her recipes come with absolutely drool worthy photos, easy to follow directions, and INCREDIBLE results. I always go into a new food blog or cook book with the thought in the back of my mind that things might not quite taste as good as the pictures look…but these Vanilla Caramel Chai Blondies did NOT disappoint! Thank you Karina! You guys seriously have to try these.

Vanilla Chai Carmel Blondies

INGREDIENTS

2 Vanilla Chai Tea Bags

1/2 C Boiling Water

1/2 C Lightly Packed Brown Sugar

1/3 C Butter (use non-fat if following Karina’s recipe strictly, I try to keep my recipes as all natural as possible)

1/2 C Applesauce (I used an unsweetened, all-natural brand)

3/4 C Sweetened (I used Truvia, Karina uses Natvia, but you could also use regular sugar, coconut sugar, or honey powder)

1 Egg

1 t Vanilla Extract

2 C All-Purpose Flour

1 1/2 t Baking Powder

1/2 t Salt

1/3 C Caramel Baking Chips

There are few flavors I love more in this world than caramel! Yum


INSTRUCTIONS

  1. Preheat oven to 350F and lightly grease a 9×13 baking dish.
  2. Steep the tea bags in the boiling water and set aside.
    I LOVE Chai tea, but this was my first time cooking with it.
    I LOVE Chai tea, but this was my first time cooking with it.


  3. In a medium bowl, whisk together brown sugar, butter, and apple sauce until light and fluffy, just a few minutes.

    I always use the real deal when it comes to brown sugar. It is less processed than refined, white sugar. And the few alternatives out there, such as Splenda Brown Sugar Blend, just don't quite cut it when it comes to that special brown sugar flavor.
    I always use the real deal when it comes to brown sugar. It is less processed than refined, white sugar. And the few alternatives out there, such as Splenda Brown Sugar Blend, just don’t quite cut it when it comes to that special brown sugar flavor.
  4. Add sweetener, egg and vanilla, and mix together.
  5. In a small bowl combine dry ingredients (except caramel chips).
  6. Gradually beat try ingredients into wet ingredients.
  7. Make sure to squeeze all the liquids out of your tea bags and add the chai to your batter, mix until combined, but not much more!
  8. Fold in caramel chips.
  9. Pour the batter into the baking tray and spread evenly.
  10. Bake for 20-25 minutes, until the edges have turned golden brown.
  11. After removing, make sure the blondies are completely cooled before cutting.


By following Karina’s strict recipe and cutting the Blondies into 24 equal pieces, they come to only 83 calories or 2 WW points. Pretty awesome!

Rebel Reps: Rowing Machine

Hey guys! So I am officially a published fitness writer on spotmegirl.com . It is a great women’s fitness website with a strong social media presence bring you workouts, gym humor, recipes, and more!

My first series I will be doing is Rebel Reps: Doing it Wrong Never Felt so Right! Where I take standard gym equipment you all have access to and show you fun, new ways to use it in ways you might not have thought of!

Today check out how I use the rowing machine to work both abs and booty. Click here to open up the full article! These moves include:

  • Ab Roller
  • Plank to Pike
  • Sliding Lunges
  • Sliding Lateral Lunges
  • Sliding Glute Bridge

Photos included!! Don’t forget to check out the full article by clicking here.

There will be more to come soon, I’m working on the assisted chin up machine as well as the smith machine. Do you have any machines in particular you would like me to play around with? Let me know in the comments below!

Easy 4-ingredient Yum-Yum Bites

So a co-worker of mine who is so sweet and also training for her first half marathon has a very special birthday today! Happy Birthday Amy! 🙂

As we usually do in my office, all of the girls started an e-mail chain to start plans on the hush-hush, and Nicole was going to make her amazing cupcakes, Kelly was bringing oreo balls (omg don’t eat these things, you’ll never stop until you hit oreo coma heaven!), etc. And I had to take the opportunity to make something with a healthy treat that everyone could enjoy guilt-free!

These little guys are also perfect for a quick snack on the go, or have a few with your eggs for breakfast! Perfect solution for so many different cravings.

Quick and Easy PB Oatmeal Balls

I love sharing healthy treats with my co-workers, and always make a point to share my recipes!

Ingredients

1 Banana, mashed

2/3 C all-natural peanut butter

1 1/2 C oats

1/2 C chocolate chips (I used Enjoy Life chips to keep these extra clean!)

Give these a try-perfect for allergies or just keeping that extra dairy out of your diet.

Instructions

  1. Preheat oven to 350F and prepare a lined baking sheet
  2. Mash banana, if still not quite ripe enough, chop into slices, then pop in the microwave for 15 minutes to soften a bit more!
  3. Combine all ingredients in a bowl.

    You could roll up and bake these…or you could just eat it right out of the bowl like this…just saying!
    You could roll up and bake these…or you could just eat it right out of the bowl like this…just saying!
  4. Roll into small balls and place on baking sheet.
  5. Bake for 8 minutes.
  6. Enjoy!


Trackers Galore: My Fitness Pal v. Fooducate

Another calorie tracker comes on to the market.

Healthify your food choices to lose weight! Get independent, objective food recommendations with Fooducate.

I first read about the Fooducate app in the latest issue of Muscle and Fitness Hers-one of my favorite women’s fitness publications on the market. As a regular user of myfitnesspal, and having tried out several of the other apps out there, I had to try this new app!

Let me preview this post by stating that I, personally, use myfitnesspal to track my calories and macros and keep them in line. So I went into a week-long test run of Fooducate with these same goals in mind, to see what this new app brought to the table-or more commonly-the tupperware.

So first things first, it asks you to set up an account, input your height, weight, and goal-all very similar to MFP. Next comes the “home page” of the app, and where the major differences begin.

Fooducate home screen and news feed.

Scan, Browse, and Track options look familiar. Unlock Premium Features-of course, gotta pay to upgrade and get the good stuff. Daily Tipsawesome! The whole goal behind Fooducate is to educate the user, and it definitely delivers. Scrolling through several articles, they were all very well written, researched, cited, and kept concise-perfect for the mobile app format and my life on the go.

Not only are these Daily Tips easily accessible on the home screen, but they are also e-mailed out in Fooducate’s newsletter, and posted on their website’s blog for larger-format reading-or printing if you don’t care about trees.

These tips and their high level of quality really ring true to the goal of Fooducate, and set it far, far apart from any other tracker app on the market. Fooducate is definitely something else!

Now, we move on to the actual tracking of food. Continuing on with the theme of education, Fooducate gives foods a grades.

Fooducate's grading system allows for reasoning, education, and alternatives.
Fooducate’s grading system allows for reasoning, education, and alternatives.

Fooducate continues their commitment to quality with in-depth grades that come with explanations. If you’re wondering why the food you snacked on received an A- they’ll tell you right then and there. I also appreciated the note about fiber, which also came with an explanation as to exactly why that was good for you.

Quest bars always get an A++ in my book.

I couldn’t believe they had given my favorite, Quest bars, a B+. And I can’t track my carbs? So I’ll never know my macro’s for the day? That didn’t sit well for me. There is a screen where you can see a pie chart, giving you an idea of the ratio of our macro’s (but only for food’s fully graded and uploaded into their system-more on this in a sec). But in order to see total fat, carbs, or protein, you have to upload to go pro.

Within my beloved quest bar I found two interesting things.

We need more artificial sweetening warnings.

The app warns the user against artificial sweeteners, a major issue in today’s food industry and something that many new healthy eater’s may not know enough about. I appreciated the thorough yet concise coverage and the links to further reading on the topic. I do, however, wish that Fooducate did separate things like stevia apart from sweet-n-low.

Too much protein? What does that even mean?

So clearly this app isn’t designed by body builders, chalk monsters, or bikini competitors. However, as taken back as I may have been, I did appreciate the thorough education behind every single ingredient. Yes-it is true, and I completely agree, that natural proteins are the best for your body. But still, “puffed up with protein” doesn’t seem like a major negative for me. I’m torn on this one! Of course it’s true, but ugh-really? Gimme all the protein!

Fooducate also provides alternative foods to those with less-than-perfect grades, which comes in handy when scanning items at the grocery store-as the app is intended for.

So only pre-packaged Tyson chicken gets a grade?

As I mentioned earlier, not everything is in the Fooducate grocery cart. Of course, MyFitnessPal isn’t 100% fully comprehensive either, but at least there are fully uploaded, macros counted options for common generic foods such as “chicken breast” “asparagus” or even “banana”. Fooducate focuses on pre-packaged brand name foods, which everything in my nutrition background warns against.

Which brings me to my conclusion. I don’t believe that these two apps belong on the same playing field. They do not provide comparable information or experiences, and Fooducate focuses on a  novice audience, while MyFitnessPal caters to all levels of nutritional education, but does not help inform its users anywhere near as much.

Fooducate certaininly has it’s place in the nutrition app world, but it is a place for health newbies and packaged foodies, and for information and product comparison on the fly-not calorie and nutrient tracking. Still, however, I cannot stress how much I appreciate the high quality content provided by the creators. I think this app is necessary, helpful, and will be extremely powerful in the right hands.

I will be subscribing to the newsletter and keeping an eye on the Daily Tips, but you won’t see me switching over. I’m going to have to give this one to MyFitnessPal due to my personal needs and goals.

The bottom line is: these two apps have different purposes, but can be used in conjunction with each other for an even better nutritional experience than either on its own.


Jazzy Things: Clean Banana Bread

Alright guys, if you don’t already know, Jazzy Things is just about the coolest chick of the inter-webs.  I started following her Instagram page the day I realized I could get fitness and nutrition info on my favorite social media. She posts websites, workouts, selfies, waffles, and so much more, I gotta say, I’m pretty pissed she moved to California as I moved out.

I’m sharing with you guys today her clean banana bread recipe she recently posted. I saw the post and immediately thought of those browning bananas wasting away in my fruit bowl (there always seem to be brown bananas around–where do they all come from? I can’t keep up with my banana purchasing habits).

The plight of the lonely, browning banana

So please, look her up, follow her, find her on Facebook, buy her e-books. You’ll be doing yourself a favor!

Jazzy Things Clean Banana Bread

banana loaf
banana loaf

Courtesy of Jazzy Things Instagram

Ingredients

3 ripe bananas

3 eggs

1/2C coconut sugar

1/4C melted coconut oil

1t cinnamon

1t vanilla

1t baking powder

1/2t salt

1/2C almond flour

1/2C coconut flour

Instructions

  1. preheat oven to 350F.
  2. mash bananas, microwave for easier mashing.
  3. add eggs, sugar, oil, cinnamon, vanilla, baking powder and salt. Mix well.
  4. add both flours, mix.
  5. Bake for one hour.
  6. Enjoy! And go scroll through Jazzy Things ID page while you nom.

    Perfectly cooked and still ooey-gooey inside.
    Perfectly cooked and still ooey-gooey inside.

Clean Chicken Nuggets

So this recipe comes to you from my amazing Aunt Katie. Not only is she amazing and beautiful but she is also extremely passionate about fitness and nutrition. She has always been an athlete, but began CrossFit about a year ago and dabbles in Paleo as well.

I am very fortunate to have a family that loves to cook and appreciates a healthy lifestyle. We always strive to cook clean recipes with fresh, organic ingredients, and of course, lots of love. At the holidays we always work a hike or long walks into our plans, perfect to help keep up with all of the less-than-clean indulgences.

I’m used to Katie’s christmas delicacies like chocolate rice crispy balls, or her famous anise (ah-nihs) cookies…but she sure knows how to keep it clean in the kitchen too!

I decided to run this recipe by the Tom taste test, not telling him what I was making, or that it was clean, and seeing what he thought. I expected good…but these turned out great! Not only did they receive a serious “yum” from Mr. Picky himself, but they are super clean and totally easy.

Clean Chicken Nuggets

These clean nuggets paired perfectly with waffle-cut sweet potato fries and plain old ketchup.

Courtesy of Katie Shafer

Ingredients

2 boneless, skinless chicken breasts

2 T olive oil

1/2 cup almond flour

1t paprika (not smoked or hot)

1/2t poultry seasoning

salt and pepper to taste

Did you know that almond flour, or almond meal, is literally just ground almonds? You can make it yourself for cheap with just a food processor. This works with cashews too!

Instructions

  1. brush a baking sheet literally with olive oil and place in the oven as it preheats to 400F.
  2. cut each breast into nugget size pieces (about 5 each). Use a mallet to pound thicker pieces so they are all the same.
  3. Combine almond flour, paprika, poultry seasoning, salt and pepper in a bowl, mixing together well.
  4. dip each nugget into the mixture, pressing on so it is fully coated. Coat all nuggets before removing the baking sheet from the oven.
  5. lay the nuggets on the baking sheet and gook 10 minutes.
  6. remove pan from oven, turn nuggets, and bake an additional 10 minutes (don’t overcook!!)
  7. serve them up! Include sauce, sweet potato fries, or veggies!

Rest is Part of the Program

DOMS: T-rex arms and Crossfit

The first thing I thought of when I googled “can’t extend arm after crossfit” and read the term “DOMS” was “ is that some Dom Mazzetti skit again?” It turned out to be less entertaining than that, but it was nicknamed “t-rex arms” which sounded kind of funny.

I was into my first official week of a month-long crossfit membership, when I woke up the morning after a workout to find that I couldn’t extend my right arm beyond 90 degrees without excruciating pain, it was swollen to about two times the size and hard as a rock. First a panicked, and then second, like any millennial, I googled.

It turned out my injury was pretty common, especially in crossfit. DOMS stands for Delayed Onset Muscle Soreness. Sure, I’d been sore before, unable to walk up stairs for days, but I’d never experienced anything as debilitating as this. This extreme soreness, it turns out, comes from eccentric workouts…which doesn’t mean unconventional or strange in this case. Eccentric contractions are those where the muscle is elongated at the time of the contraction.

eccentric-contraction

My good friend Lauren is an avid pole fitness fanatic, and she is constantly elongating her limbs while trying to hold herself up on the pole and still manage to look graceful…it’s pretty incredible.

It is that exact type of exercise that is to blame for the beloved t-rex arm. So it turns out crossfit and pole dancing have more in common than I thought? Well…sort of. The day before my injury, I’d been doing toe to bars, a fancy circus form of hanging abs, and the day before that I’d been doing pull ups, and in between them I’d been doing burpees, pushups, and handstands. I like to think I’m pretty strong and tough, but it turns out I can mentally put up with a lot more exertion than I can physically.

As it turns out, the swelling is part of the healing process, and the inability to extend is a protective function to keep from further injury. So does that make it a good thing? Yep! I might be able to push myself hard as all hell, but the truth is, my body needs to catch up to where my mind is at physically, and a few days of t-rex arms is exactly what I needed to take a step back and let my body catch up.

353 Dollars, 13 Pounds, and 5 Weeks

So I last left you at the bottom of Mt. Washington, my friends and I reeling in the glory of our accomplishment, smiles plastered across our exhausted faces. Although my blue toe may have been a blip on my radar at the end of the day, it grew into a much bigger problem. $353 in doctor bills, 13 pounds, and 5 weeks later, I finally began to pick up the pieces after a serious injury.

We all hear about injury protection and worry about over-exerting ourselves. But for the most part, it remains just that: a worry. Now, of course I didn’t go through Tommy John surgery or a broken femur, but I can imagine the experience is similar, on a grander scale, of course.

Suffering through an injury is a grieving process, it comes in stages, it leaves you a better person for going through it, and it hurts like hell.

Stage 1: Denial

“No, babe, I’m fine, I just need to keep it elevated and relax,” I told Tom. My feet were propped up on three pillows at the end of the bed, the right looking normal, and left about twice it’s normal size, flushed, and topped with a dark blue big toe.

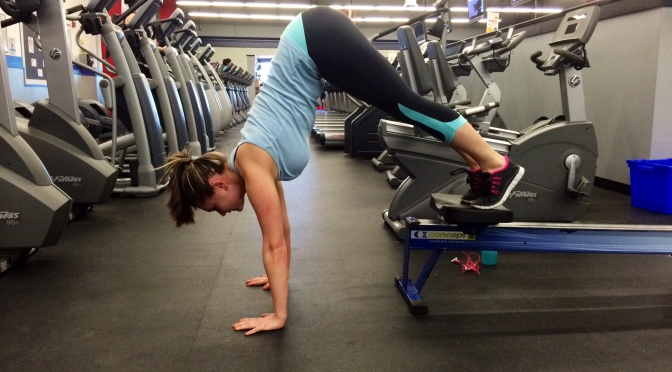
“I just need to take a shower first,” I said as I hoped off the bed, hobbling around the room. I couldn’t feel anything below my ankle, so my gait was awkward, clunky, and I relied completely on my right leg. Tom tried to help, but I refused to look weak. Injury? What’s that? After struggling to take off all of my clothes and get the shower started, I stood under the pouring water, bracing myself against the wall. Every movement felt more uneasy than the previous, so I slide down the back of the tub, tuck my knees into my chest and let the scorching water run down my body, finally letting my muscles release. The water burns but my left foot throbs hotter, like it’s soaking up all of the water like a sponge. I think about anything to get my mind off of the pain, what am I going to workout tomorrow at the gym? I’ll probably be pretty sore, maybe it’ll be a yoga day. Or how about some handstand practice? I wonder if my arms will be sore too…

Once it’s felt like a long enough time for a proper shower, I crawl to the front of the tub, turn off the water, and sit there, air drying is a thing, right?


Stage 2: Anger

All couch and no gym makes Mia an angry girl. I can barely stand sitting around on a Sunday, let alone every day of every week for about five weeks.

It took a lot for me to accept that I had to go to the doctor in the first place, and then for him to tell me that I basically couldn’t walk for the next three weeks, I was not a happy camper.

“Well, basically we have two options,” Dr Malcom told me, “you need to stay off of it as much as possible, then in three weeks we will have a follow up where I’ll either have to make an incision and fix things manually, or you’ll be good to go!” Well that’s fine and dandy, but what on earth is wrong with my foot? “What we have here is acute frostbite, combined with an impacted nerve.” Who the hell does that happen to?

The anger spiraled from that appointment, to me ordering people around from the couch, to spewing out pure negative energy at all times of the day, every day.

It felt like I had a certain amount of energy that had to be released every day, and since I was barred from the gym, most activities at work, and basically anything aside from watching Netflix, that energy had to come out in anyway possible; unfortunately the easiest way was to just overflow in anger and frustration.

I was mad that I couldn’t do anything, I was mad that I was gaining weight, I was mad that my half hour doctor’s appointment left me with a $100 co-pay and $150 antibiotics. It began to spiral out of control, to the point where I was barking orders at everyone around me, lashing out in any all every capacity.


Stage 3: Bargaining

By week three, I was exhausted. The energy I couldn’t place in any healthy capacity began to fade, and was replaced with endlessly restless thoughts. If only I had checked my boots one more time before heading down the mountain…if only I hadn’t worn the liner socks…if only I had said something when my toe started to hurt… At this point, I think everyone around me became grateful that I had quieted down, but the gears were still turning just as quickly. All of the anger internalized, and I tried to think my way out of my injury, fixating on every detail of the hike.

I made a lot of pacts with myself during this stage of the injury. “I will listen to my body more throughout my workouts,” “I will allow myself to rest in order to not over exert myself, “ “I will do yoga twice a week,” “I will stretch after every workout,” and the list goes on and on. This was the fist light of positivity, but the internalized anger began to slowly change into an inner sadness that I slipped into quite quickly.


Stage 4: Depression

This is the stage that I got stuck in the most. Self-pity is an ugly thing we never want to admit to, but the sadness overwhelmed me, and soon the gears stopped turning, but I remained silent, stuck in my own head, wallowing in my sadness. I binged not only on crap food I never used to bat an eye at, but even more so on feeling bad for myself. “aw, poor me, I don’t even know who I am anymore” I was completely detached from the woman I was pre-injury.

The pacts I’d made faded away, I stopped writing, and I barely paid attention to the TV shows I spent all of my time watching. My work began to suffer, and even Tom began to suffer, feeling helpless as he watched me fade into a very different version of myself.

At this point, there really was no energy being transferred anywhere. I could no longer identify with myself or anything else; I became my injury.

“Why don’t we just go to the gym and do some abs and upper body?” my good friend and gym buddy, Kara, asked me. “I can’t even put my gym shoes on, I don’t want to be seen in there in Uggs.” I’m sure she could smell the bullshit, but she understood. I would come up with any excuse I possible could to stay in this safe, comfortable depression I found myself in. Not only had I grown a little more fluffy and complacent, but also lazy. It was just easier to be depressed, after all I had an excuse, right? I had freakin’ acute frostbite!


Stage 5: Acceptance, Healing

His hands were cold as he poked and prodded at different parts of my foot. The tip of my big toe was still numb, but it was back down to its normal size, no longer throbbing, and the nail wasn’t completely purple.

“Good news,” he started off with, “It looks like the nerve has settles back into place on it’s own, the nail matrix feels in tact, and I don’t think we’ll be cutting anything open today.” I was waiting for the next sentence, the “but…”, the bad news. When nothing came, I asked, “so, can I, like, go to the gym and stuff?” Dr. Malcom laughed a little and just said “yeah.”

In my head I’m thinking, what??? How long have I been able to go back to the gym. I can go back!!! I can use my foot! And although that co-pay was an odd $103, I was dancing out of that office like I had never been injured at all.

Just hearing that I was okay, changed my entire outlook immediately. I finally snapped out of my injury depression and was ready to push my boundaries and get back into action.

Sure, it took another few weeks to get completely back to normal, and I’m still not where I was, physically, but my head was back in the game right away, and a bum foot, or a few extra pounds is nothing compared to a sick mental state. The physical aspect of an injury is just the tip of the iceberg, below there are layers and layers of self-doubt, anger, depression, and so much more. It’s no wonder to me now that there are sports psychologists getting paid millions of dollars each year to work with professional athletes through the pain and frustration of injury, recovery, and re-instatement into their respective sports.

I may still not be completely healed, but I know my body better, and I know my self better.

Meathead: Grass-fet Bison Burgers Wrapped in BACON

What do you do when you realize the bison meat you just bought has a sell by date of tomorrow? you improvise!

The best part is, Tom was actually willing to try these bad boys! Unlike 95% of what I cook: “veggies…ew!”

I had looked up a million and a half bison recipes trying to find the most alluring dish, but when it came down to it, I wen’t for simplicity. I’ve definitely learned that simple recipes just work.

These giant burgers are juicy and delicious. Perfect for paleo-ers and everyone else!

And so, I introduce to you: Bacon-Wrapped Grass-Fed Bison Burgers

Ingredients

1 lb grass-fed ground bison meat (found at my regular grocery store!)

1 whole egg

1/2 white onion, finely diced

prepared steak seasoning (yeah, I know its not strict paleo or “clean”…it’s just easy!)

salt and pepper to taste

4 slices thick cut bacon

Directions

  1. preheat oven to 350 F
  2. combine bison, onion, egg, seasonings in a bowl
  3. form into 4 even “patties” but keep them pretty thick! (they will seem huge!)
  4. Wrap each patty with one slice of bacon, it should be the perfect length to not have to cut any excess off. Secure with toothpick for baking.
  5. Place on a foil-lined baking sheet and back for 30 minutes.

Chicken Apple Breakfast Patties

In deciding to give the paleo diet an honest go, I’ve encountered more struggles than benefits so far.  Now before you go and tell me that the science behind the “cave man diet” is bogus: I know! But there are still benefits to avoiding dairy and grains that can’t be underestimated. It’s all about trying it all until you find what works for you…and then trying even more just to see!

So my biggest struggle right off the bat has been breakfast. I lived off oatmeal or Ezikiel bread and peanut butter….now all of those have been taken off the table. In order to get a quick and easy protein/carb combo, I came up with these little sausage-like patties that are completely paleo and will make your kitchen smell amazing!

Chicken Apple Breakfast Patties

Three chicken apple patties and some yolk porn

Ingredients

1 lb ground chicken

1 apple peeled and diced (I used a Fuji apple)

1 T fresh thyme

3 T fresh parsley

1 T fresh oregano

2 t garlic powder

coconut oil


Directions

  1. Preheat oven to 425 degrees
  2. Using about 3 T of coconut oil in a skillet, cook down the apples with the thyme, parsley and oregano until apples are soft. This will take about 7 minutes. More if you use less coconut oil.

    The smell of the apple, thyme, parsley and oregano is incredible
    The smell of the apple, thyme, parsley and oregano is incredible
  3. Once cooked and cooled, combine apple mixture with ground chicken, garlic powder and salt and pepper to taste.
  4. form into 12 even patties spread out on a foil-lined baking tray
    ready to pop into the oven, consider doubling your batch, as I did, and freezing half for later use.
    ready to pop into the oven, consider doubling your batch, as I did, and freezing half for later use.


  5. bake for 20 minutes.
  6. Store either by refrigerating, freezing, or both!